Adobe InDesign
Indesign® Book Printing
We make printing your book easy. Just upload your book and print!

Follow these steps in Adobe InDesign to create a complete book and enjoy PrestoYearbooks' book printing and great everyday pricing!
- Create your book in Adobe InDesign (following the guidelines listed below)
- Select “File” > Choose “Export” > Name your file and select the location you’d like to save the file to > From the drop down menu at the bottom select “Adobe PDF (Print)” > Once completed, select “Save”
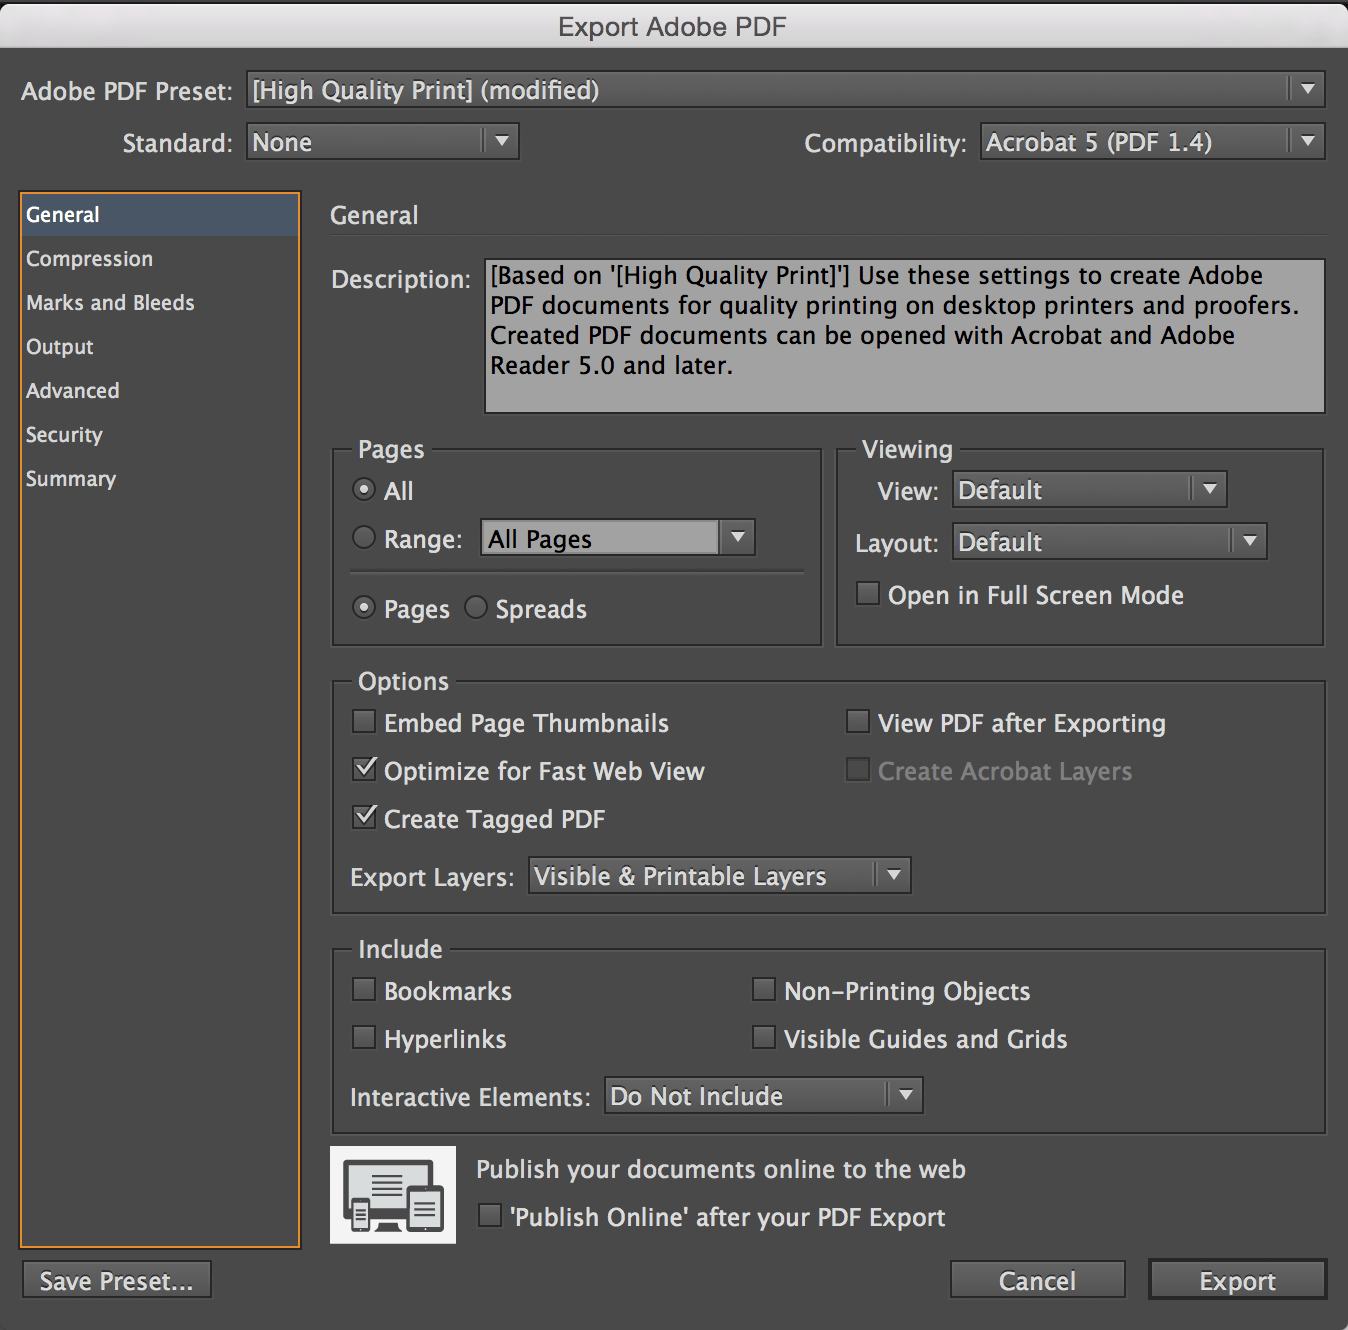
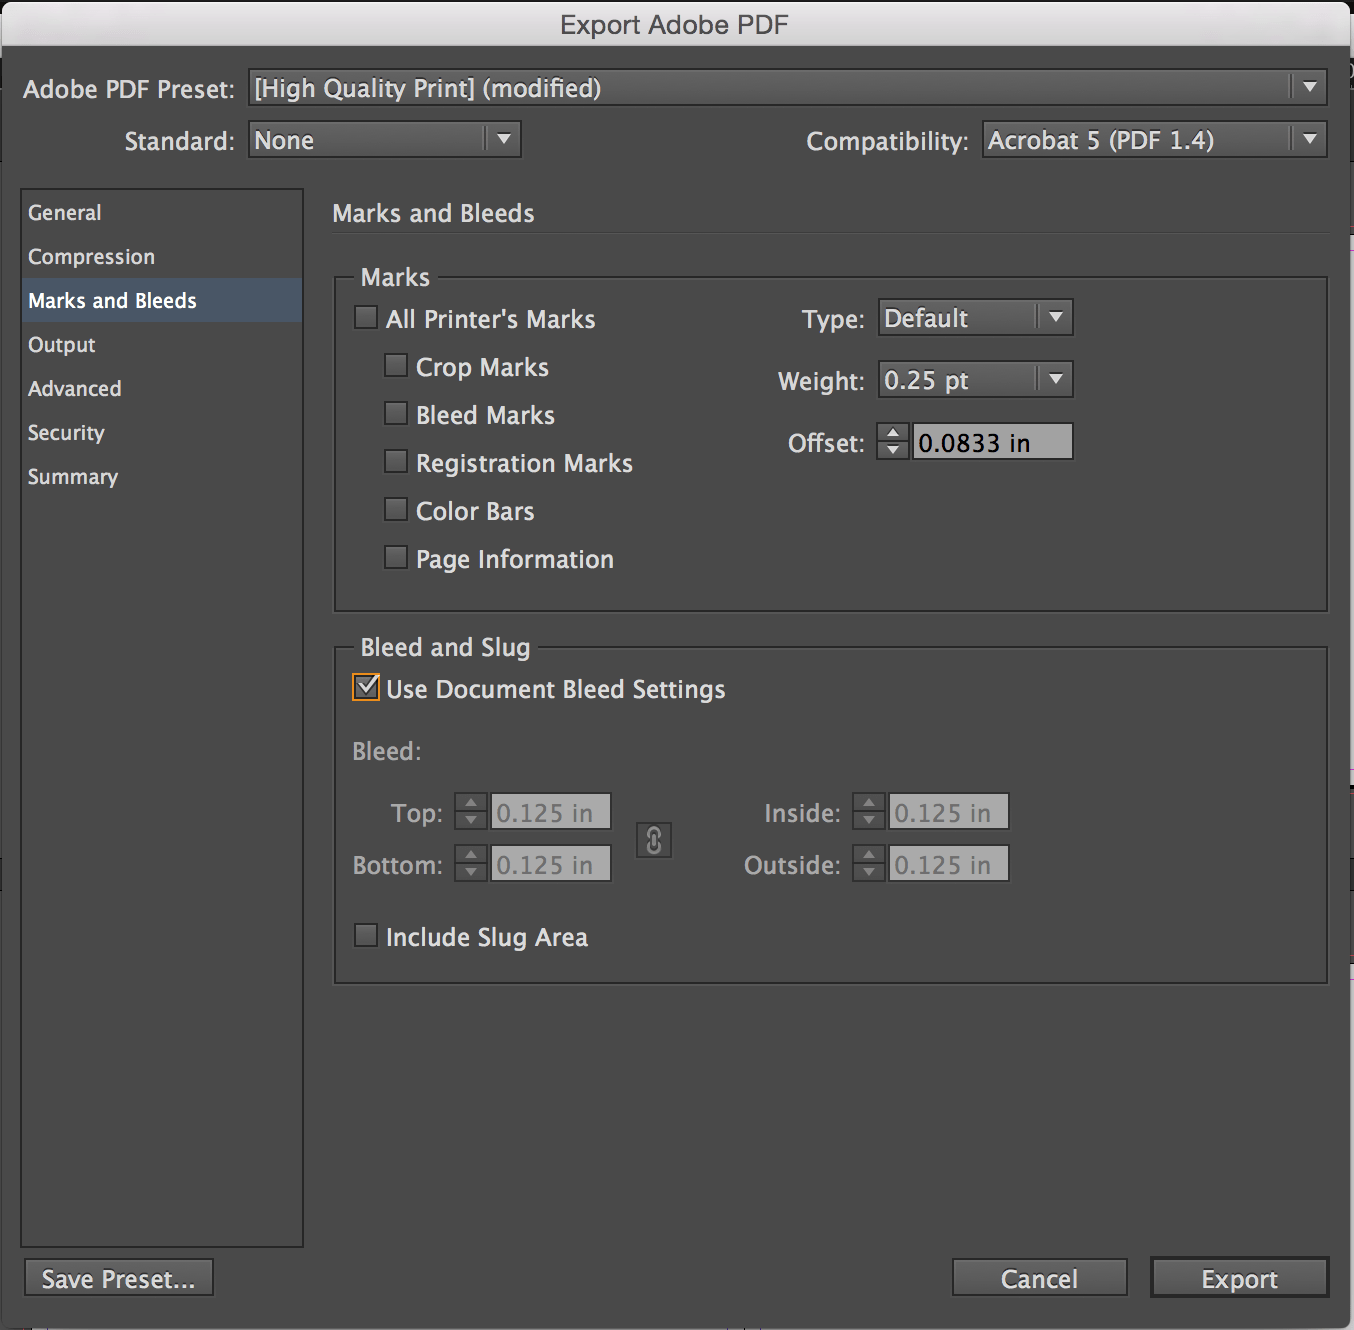
- Under “General” > “Pages”, ensure the “Pages” button is selected. Under “Marks and Bleeds” select “Use Document Bleed Settings” under the “Bleed and Slug” section. Then hit “Export”.
- Upload your PDF to PrestoYearbooks and you’re all done!
Please note: When creating your InDesign file, you have one ideal way to create your front and back covers. You can read more about that below!
When creating your book in Adobe InDesign, it is very important to understand how to best format it for printing with us. There are three key things to remember:
- Adjust Text and Pics so they don't get cut off.
- Ensure you Export your file as “Pages” instead of as “Spreads”
- Ensure the pagination in your project is correct!
Setting Up Your Document
Unlike traditional offset production, our on-demand printing is optimized for a simple document that is the full size of the book with bleed, without crop marks. The best way to set up your document is:- "File" > "New" > "Document"
- Select the following in the “New Document” window:
- number of pages
- check "facing pages"
- enter in the final page size of your project plus .25". (For example, if you're creating an 8.5x11", set the width to 8.75" and the heigh to 11.25")
- set margins to: 1/4" or .25"
- set bleed to: 1/8" or .125"
- Start designing! Make sure to keep your margins in mind, and ensure no important content ends up being trimmed off in production.

How Do I Create My Cover?
When designing your book from within Adobe InDesign, there is one fool proof way of designing your file.
When you set up your document, Page 1 should be designed as your front cover and Page 2 should be designed as your back cover. You would then begin designing your interior pages on Page 3.
Setting up your file as such allows your first two pages to be removed during upload without altering the pagination of the interior of your document!
Please Note: If you intend to design 2-page spreads, keep in mind you will ned to start designing these spreads on an even number. If you start your 2-page spreads on an odd number, the pagination of your project will be off and the spreads will print incorrectly.
What Colorspace do I need to use?
When exporting, we recommend you choose sRGB or U.S. Web Coated (SWOP) v2, as our production line is calibrated for these colorspaces. If you use an alternate or custom profile, your results may vary. If you want to preview your document, use US Web Coated SWOP as your profile to get the best approximation. However, we suggest most customers use sRGB unless they have advanced graphics (non-photo) designs.Follow the steps below to make sure that your file is in the correct colorspace!
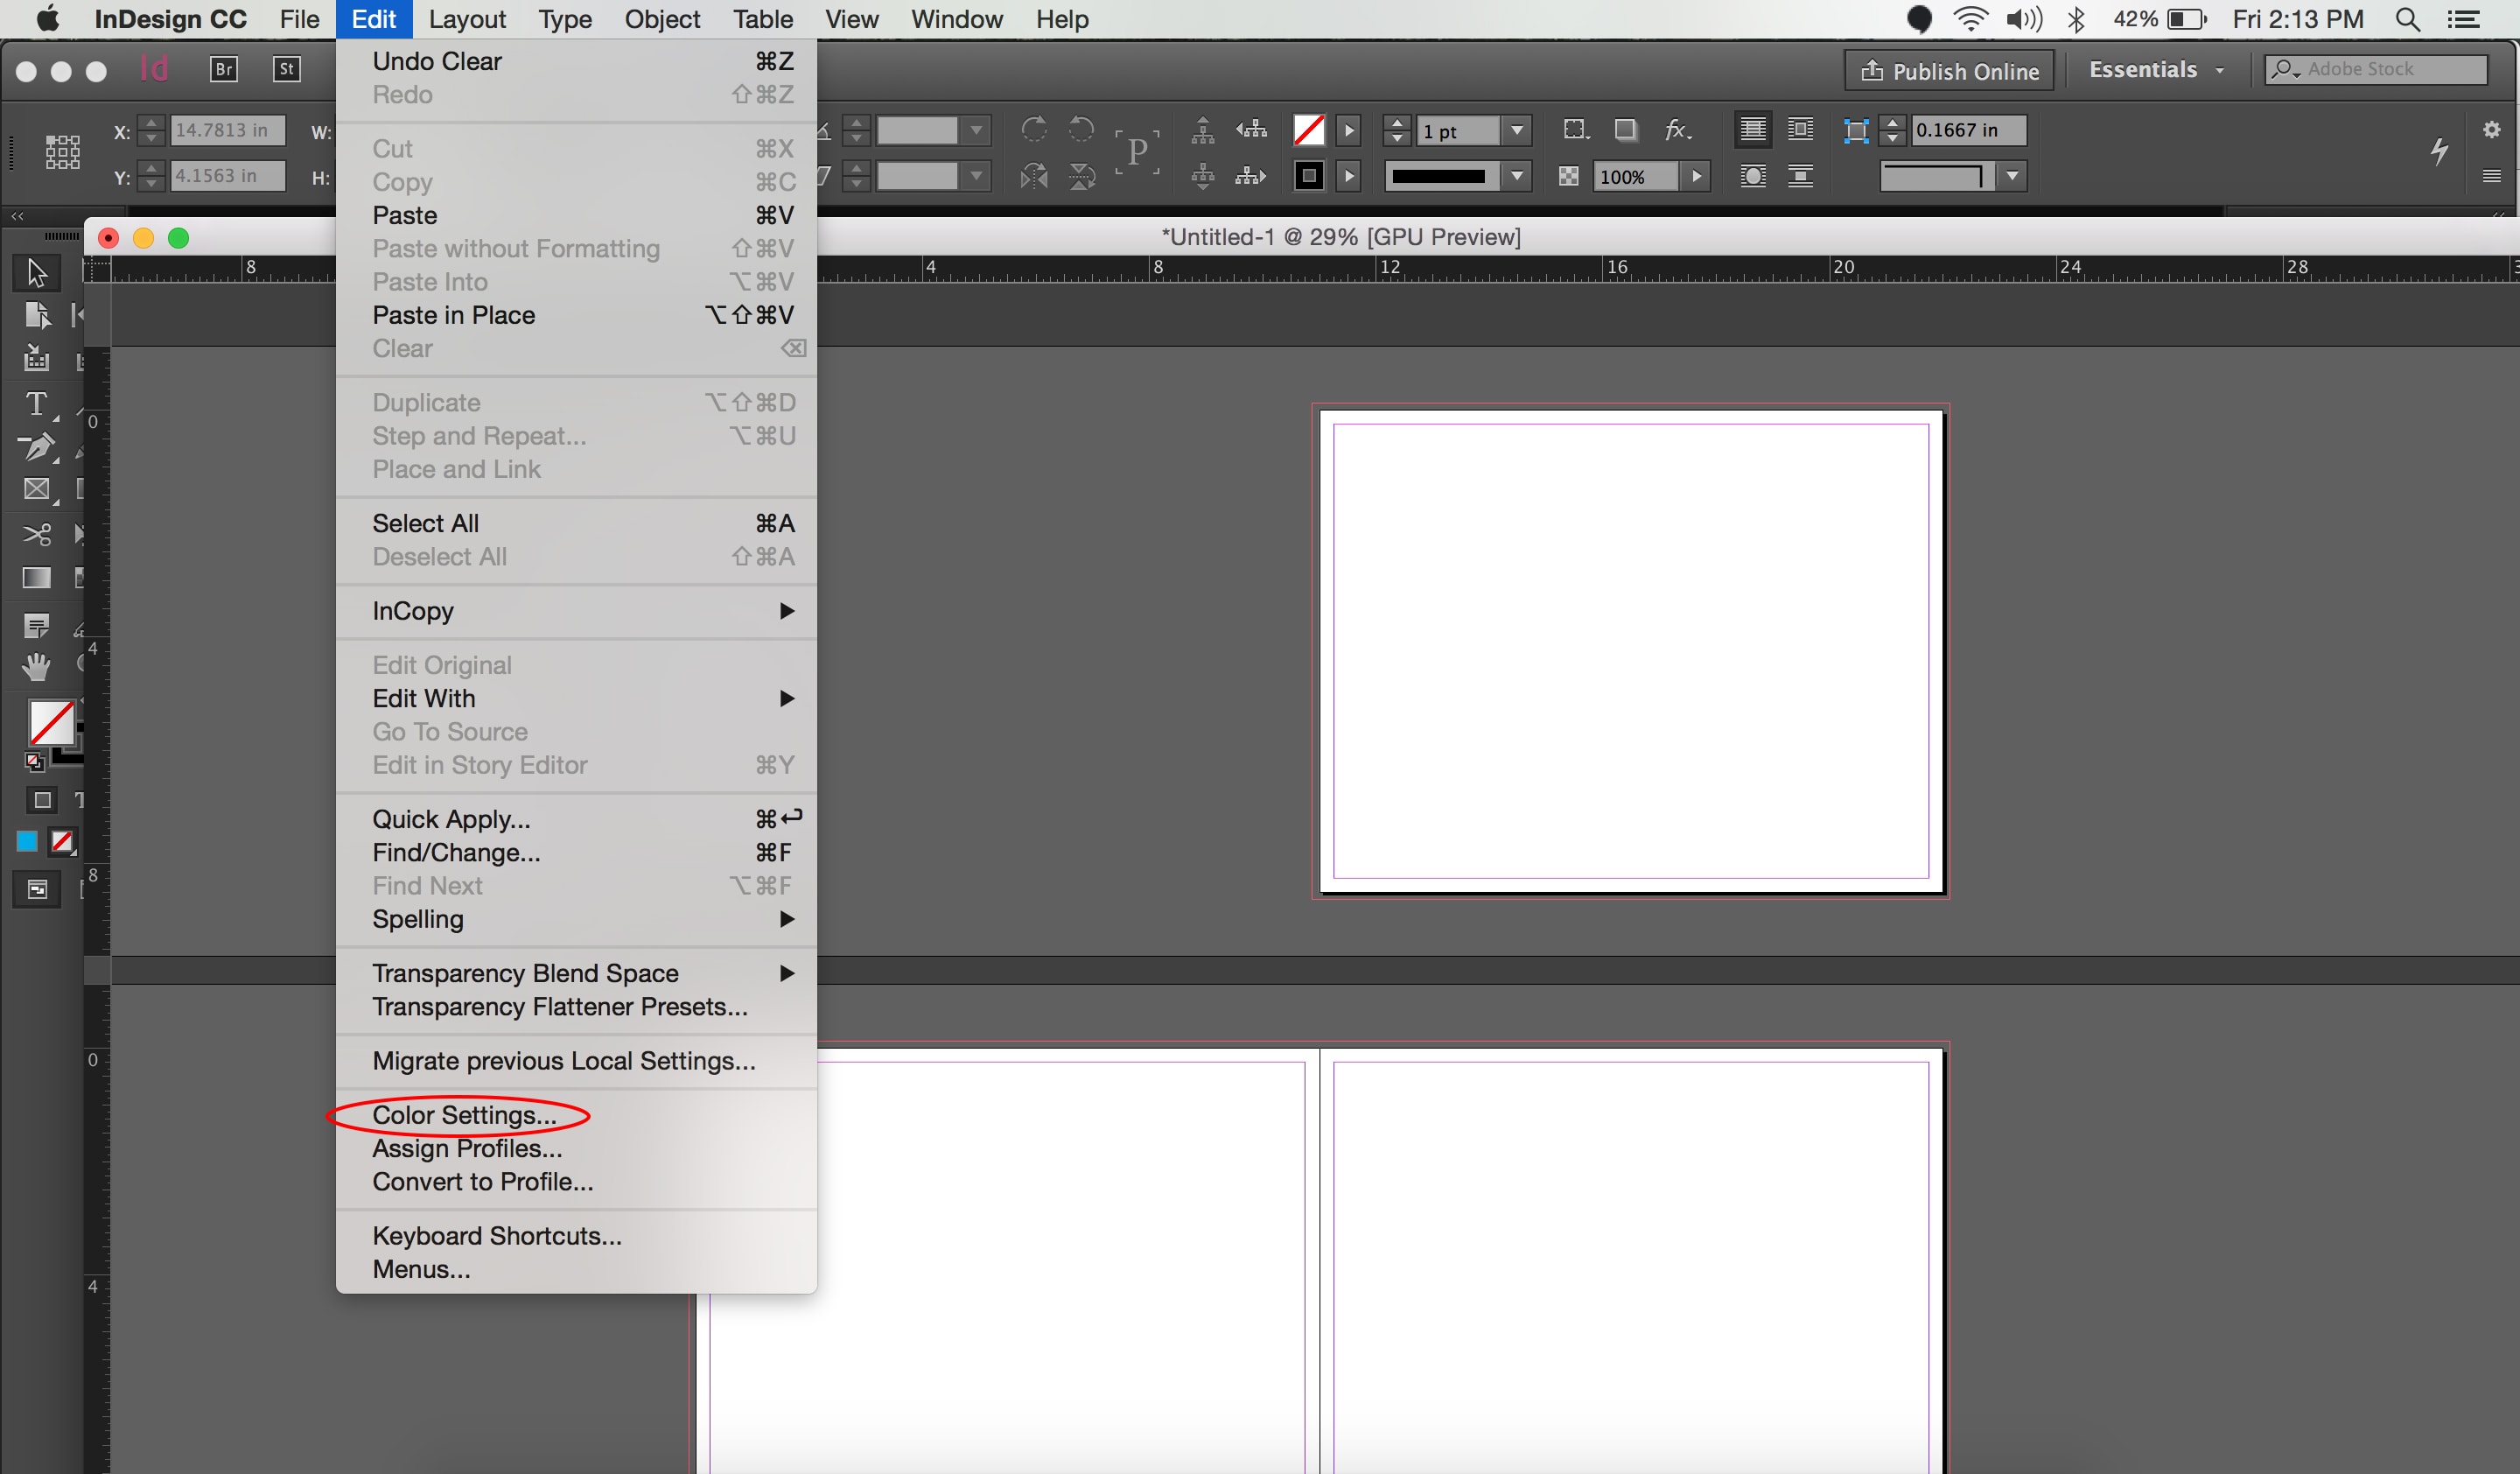
- Click “Edit” > “Color Settings”
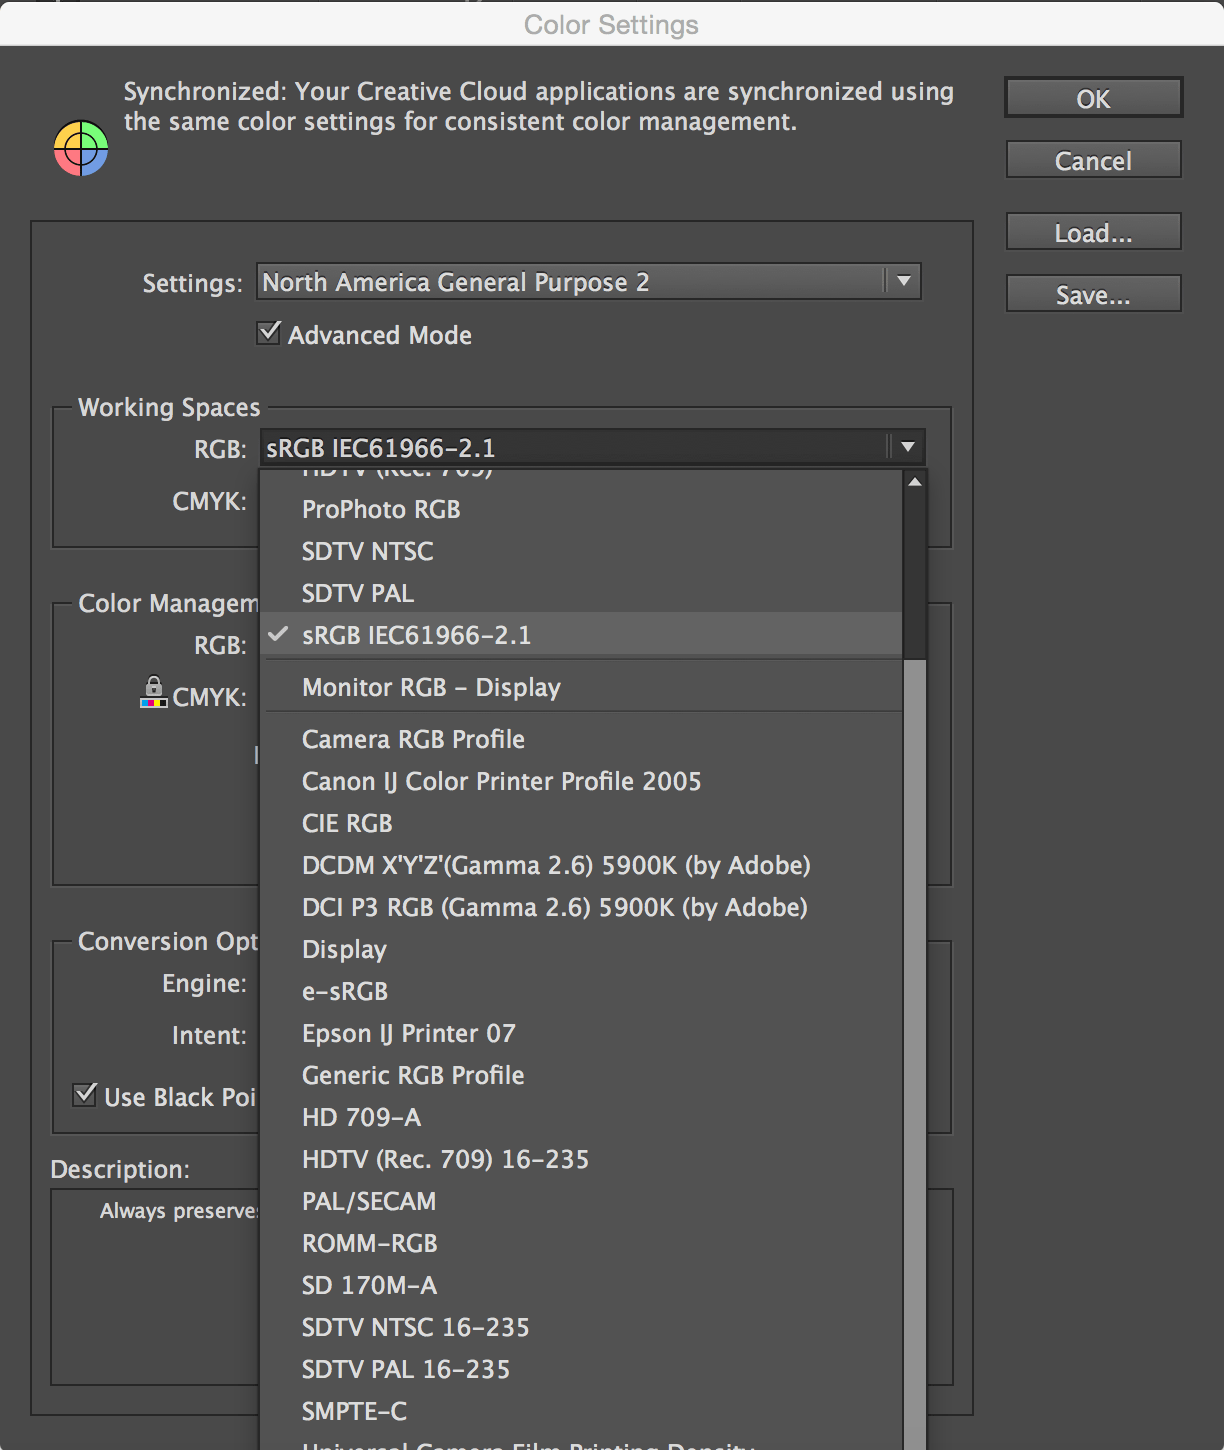
- Under “Working Spaces” select the following:
RGB: sRGB IEC61966-2.1
CMYK: U.S. Web Coated (SWOP) v2
I’ve Made My Book! How Do I Save It?
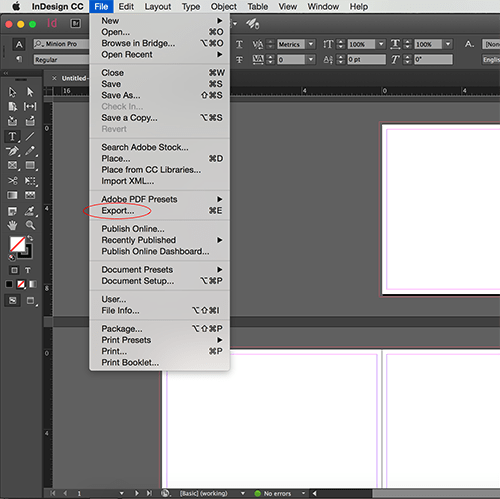
You’re halfway there! Now that you’ve designed your book, it’s time to Export and Upload to our site. The steps below will ensure your file Exports properly for the best printing outcome.- Click “File” > “Export”
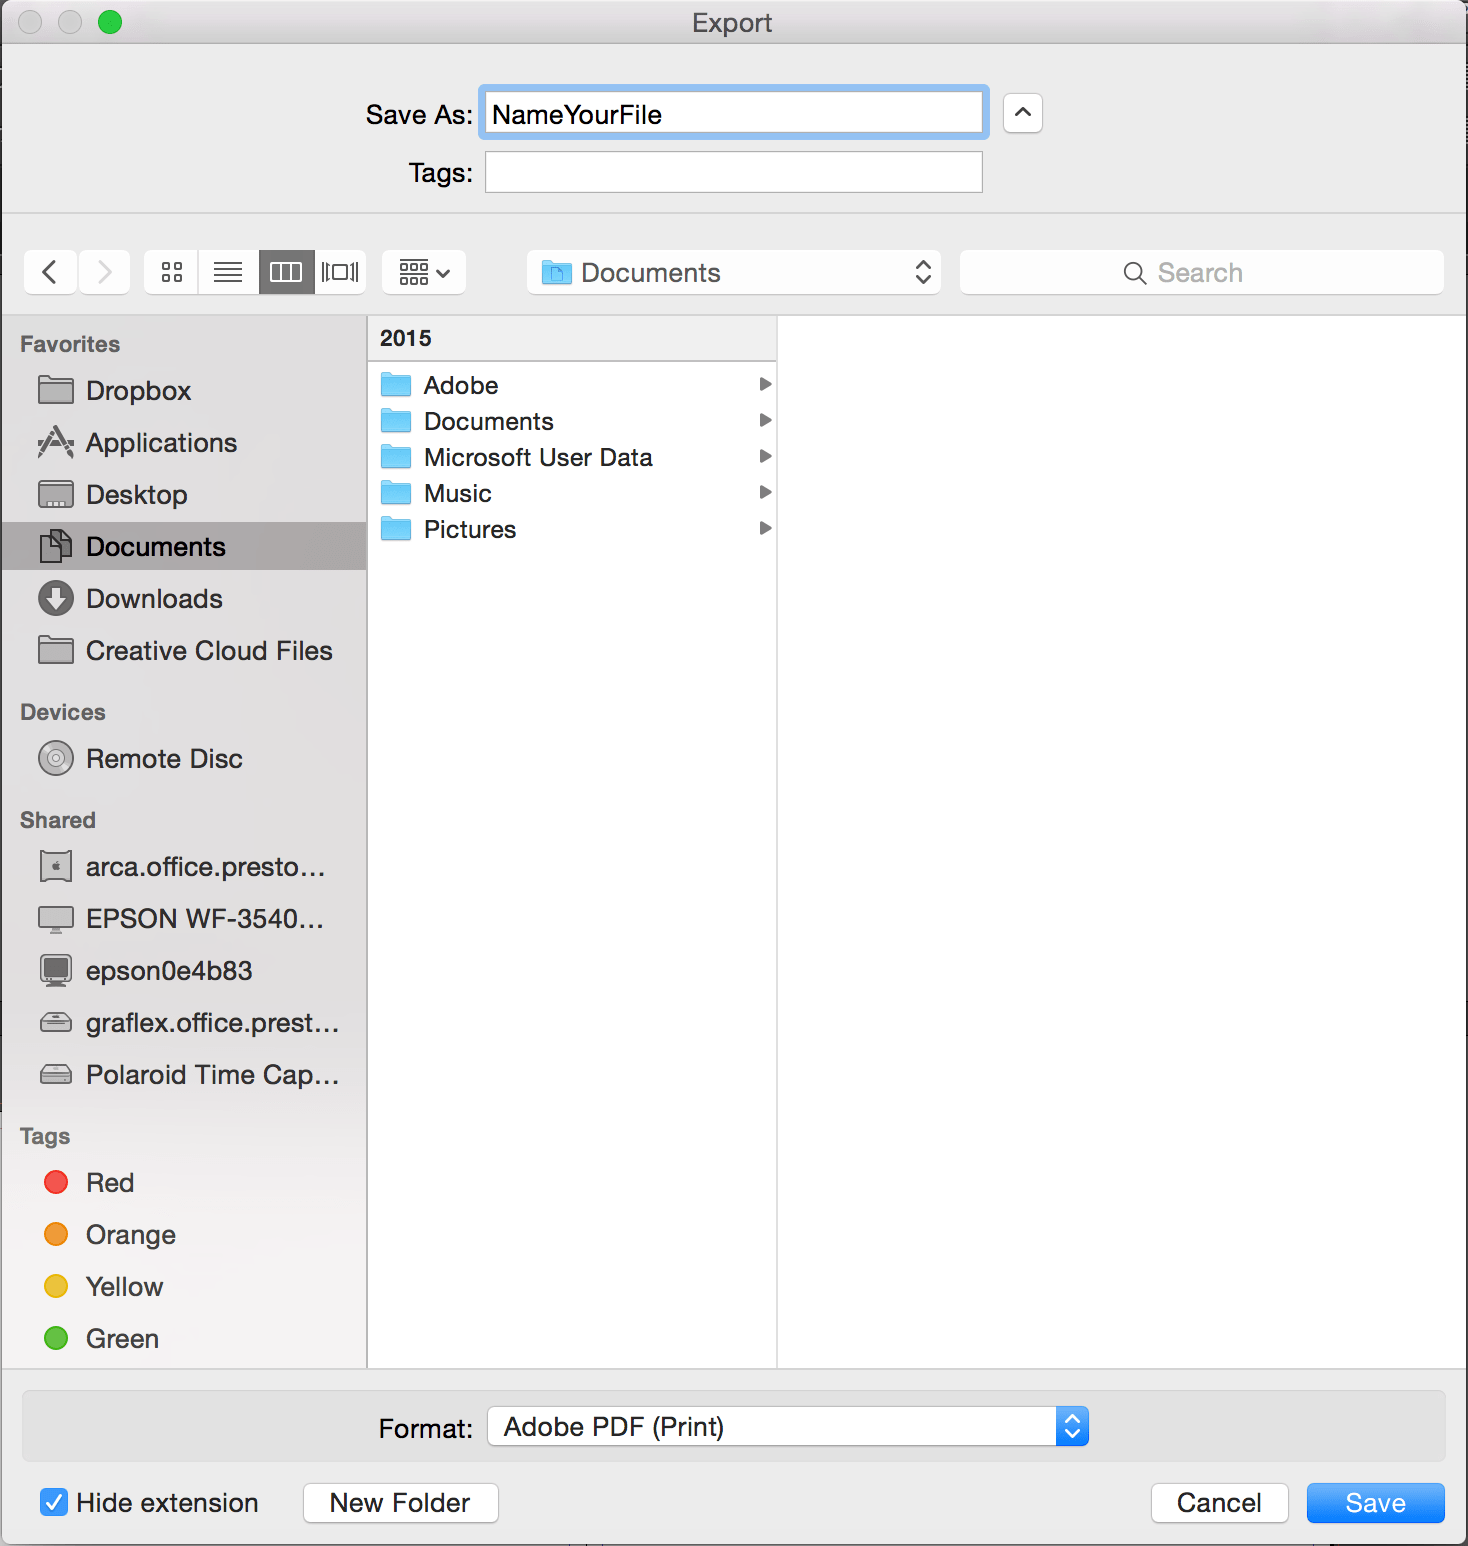
- Name your file and choose where you’d like to save it
- From the drop down menu at the bottom select “Adobe PDF (Print)”
- Once you’ve done that, click “Save” at the bottom
A new “Export” window will pop up, ensure the following items are selected:
- Under “General” > “Pages” - Pages should be selected Please Note: If you save your file out with “Spreads” selected, we will be unable to print your book. If you're ever unsure of if you’ve saved out your file properly, just send us a quick note and we can double check before you place the order!
- Under “Marks and Bleeds” > “Marks” - Ensure these check boxes are NOT selected. Selecting any of these boxes will include marks on your document, which will skew the final document size.
- Under “Marks and Bleeds” > “Bleed and Slug” - Check the box that says “Use Document Bleed Settings”
- Once complete, hit “Export” and you’re all done!
Adobe PageMaker
Adobe PageMaker "I am using Adobe PageMaker 7.0 to create my PDF. My book is 9 x 7. My pmd file is about 35 MB. I am using Adobe PDF to create the PDF, printing through the pageMaker application. I have also tried using Acrobat 6.0 Professional and Acrobat Distiller to create the PDF."Try these steps using PageMaker 7.0:
- Create a new document with the size 9x7 and the orientation set to "wide"
- Then go to Print
- Select a PDF printer
- There is an option for orientation, select the left option(with the man standing upright)
- Next click on the "Paper" button on the right.
- Under the paper size, select "Custom..."
- A new window called "Custom Paper Size" should pop up
- Set the width to 9 inches and the height to 7 inches and hit ok
- Hit Print and it will create a 9x7 pdf file.
A Few More FAQs
InDesign’s default measurement unit is picked as (sixths of an inch). In order to change that setting to inches you will need to, first, make sure no document is open. If a document is open the changes will only occur in that document.
On a Mac Go to the InDesign menu and under “Preferences” choose “Units & Increments” look for the “Points/ Inch:” box, scroll down and select “PostScript (72 pts/inch) to change your measurement to inches.
On a PC Click the “Preference” which is located under the “Edit Menu”, go to the “Units” tab on the right and select Inches.
Don’t worry! The most common reason our site states that there are no products available is due to your file being uploaded in a size that we don’t offer. With books created in InDesign, this typically means that you saved out your file with the “Spreads” button selected during Export, instead of the “Pages” button.
All you’ll need to do is go back into InDesign, Export that file following the directions above and re-upload to our site!
This is called a Transposed Bleed. InDesign automatically formats your document with Transposed Bleeds to ensure your book has that nice “finished” look to it.
If you find that the PDF resulted with transposed bleeds in the gutter of your book and you wish to correct this then you can click here.